Microsoft’s SharePoint offers intelligent business process automation solutions. The SharePoint platform is agile and easy-to-use for teams to work collaboratively in managing project tasks. To successfully implement the workflow automation with SharePoint, it is important to follow industry proven procedures.
How to Use SharePoint Document Workflow Automation
The manual document approval process requires users to send emails back and forth between each other until the document is finalized. This is a time-consuming and frustrating task.
The SharePoint automated document approval process automatically updates all authorized team members regarding the status of the document approval until the document is finalized. This way project management costs and efforts are saved.
Usually, any document to be approved will have three or more approvers. The admin holds the right to decide on how many approvers are required for a specific document and configures the workflow process accordingly.
Each Approver will have two options: Approve or Reject. When a document is approved, an email will be sent to the all the people in the document workflow process.
Say, if the document gets rejected, the workflow loop restarts with the first approver. Again a new task will be created and sent to every approver in the flow. The next level (+1 level) of approvers based on the review can either approve or reject the document. When the next level of approvers acts on the task and approves, the respective level in the flow will be skipped.
In built-in approval workflows, editing fields in tasks is not permitted. Instead, users can only comment on the field section and action buttons. To do so, users can go to the task list and click on the respective task link, which will automatically direct to edit a comment in the form.
To automate the above scenario, we have to go with building custom workflows through SharePoint Designer. To do so, here is step-by-step process for successful automation of custom workflows:
How to Automate SharePoint workflow:
Step 1: Create a document library.
Step 2: Create a list of approvers.
Step 3: Create a list of tasks.
Step 4: Build a workflow in the Document Library.
Step 5: Use call to HTTP to retrieve the approvers count from the list of approvers.
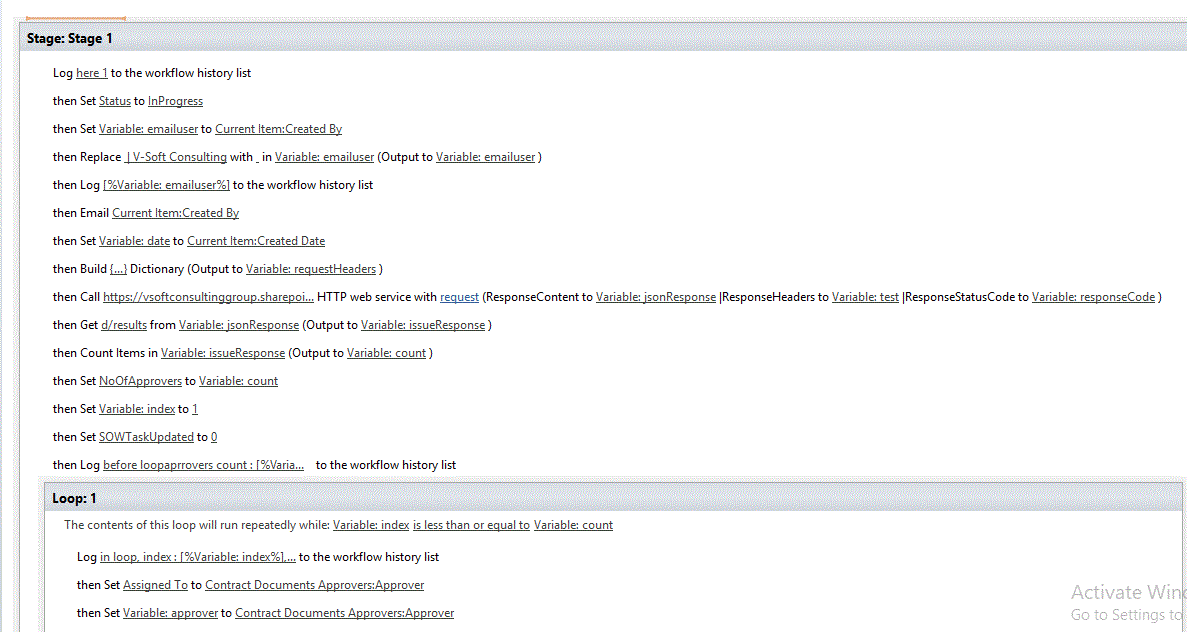
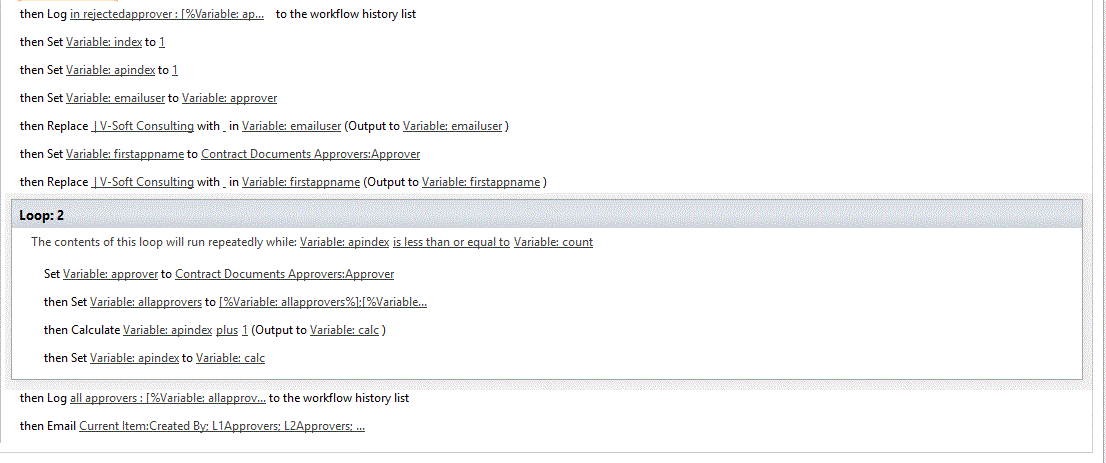
Step 6: Create an index variable and use a loop with a condition for all the approvers until they are finished.
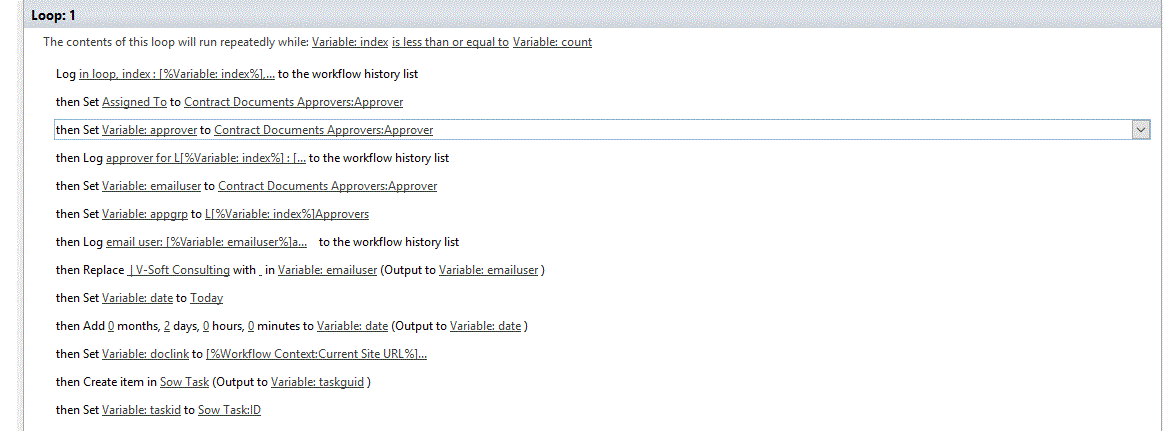
Step 7: Create an item in the custom task list.
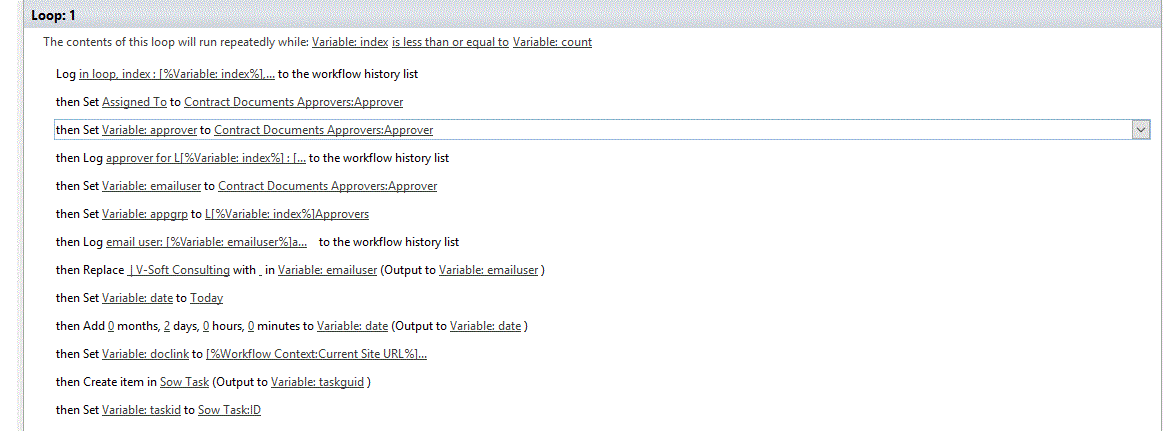
Step 8: Use wait for a field change in the current item is equal to a value.
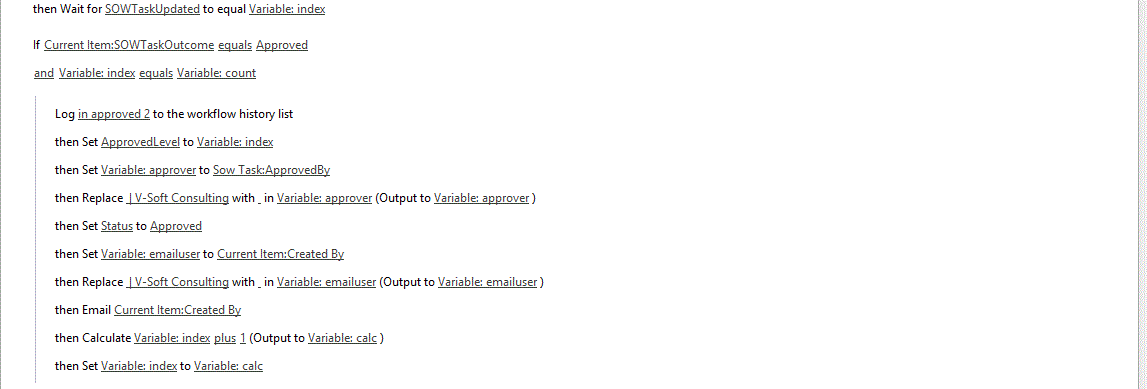
Step 9: Create another workflow on a custom task list and when an item gets updated, update a field value in the document library for the respective document.
Step 10: If the task is rejected make index 0 and then it will go to the first approver. If the task was approved the index will increase and moves to the next approver on the list.
If you want to learn more about SharePoint automation solutions that are appropriate to your business use case, sign up for a free consultation with our experts.
 About the Author
Naresh Kumar is a Senior Software Engineer at V-Soft Consulting. He has more than 5 years' experience in software engineering and is a Microsoft certified Office 365 developer. His core technical expertise is in SharePoint Server, SQL Server, Office 365, EMS, Windows 10 and Windows Server.
